

Bringing home and raising chicks is an incredibly rewarding experience that transforms your living space into a lively haven of warmth and happiness. Whether you’re a seasoned poultry enthusiast or a first-time caretaker, the journey of nurturing chicks offers unparalleled joy and valuable life lessons.
As you witness these tiny bundles of energy grow into healthy, clucking companions, you’ll find yourself immersed in a world of wonder and connection. From choosing the right breed and setting up a cozy brooder to ensuring proper nutrition and healthcare, our comprehensive resources and expert guidance are here to support you every step of the way.
WHAT DO I NEED TO BRING HOME CHICKS
Like anything you can make this cost as much or as little as you want. Don’t get caught up in making it perfect. You likely don’t know what is actually most important to you yet!
Potential Start Up Costs:
- Brooder – we used this soft sided zip up kennel with a kiddie pool inside. It works great and was extremely easy to clean. We have also had great success with rubbermaid tote containers!
- Chick Size Feeder
- Heat Plate (or lamp)
- Chick Size Waterer
- Chick Starter/Grower Feed
- Chick Electrolytes (I always use Jill Wingers at The prairie Homestead when I bring chicks home but like to have the powder on hand for emergencies)
- Bedding
- Feed storage
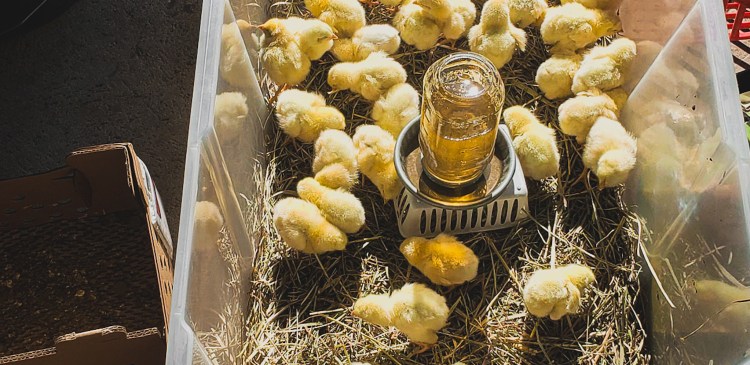
STEP 1: PREP THE BROODER
Raising chicks is most complicated in the early weeks of their life. They need access to heat most especially!
Line a plastic container with an absorbent bedding like shavings or bedding pellets. Make sure they have unlimited access to a quality starter/grower feed and clean water. Chicks can drown in a remarkably small amount of water. If you notice your chicks stuck in their waterer, add rocks to the basin so they cant be submerged.
STEP 2: PICK UP YOUR CHICKS!
Option one is to pick up from a local feed store – It is almost impossible for me to walk into a feed store in the spring without walking away with a few. You walk in and their little peeps call to you from across the store and they are so little and cute!
Option two is to Order your chicks from the Hatchery. They will give you a hatch date and your birds will arrive to your local post office where you can pick them up!. This was the weirdest part of raising chicks the first time! The post office will call you as soon as they open. Most hatcheries will ship overnight if not 2 day shipping so if you skipped step 1. When you get to the post office tell them you are there to pick up the birds, they will confirm your name and address and send you on your way.
STEP 3: INSTALL YOUR CHICKS!
Chicks will need to be shown where the food and water is. Do this by carefully grabbing the chick around the body and quickly tipping their beak into the water. When you raise them back up you will notice them moving their beak/processing the water. Do this with each chick.
STEP 3: LISTEN & WATCH
Chicks are busy bodies. They scratch, peck, peep and play all day! Just like parents can tell the difference in their babies’ cry patterns and body language, you can tell a lot by listening to and watching your birds.
LISTEN:
- Content = near constant pleasant chirping they scratch, eat, and play keep away with a cool piece of bedding. You may hear the occasional scuffle or offended noise but they settle it quickly and go back to chirping
- One chick peeping loudly = alarmed, lost, trapped, or hurt. Check on them. Every time. Most often, they hopped onto something like the feeder, waterer, or heat plate, and could no longer see their friends and got scared. I just guide them back to their friends and that usually settles it. If nothing seems wrong and you have a cat, they were probably giving them the death glare from across the room. Cats, man.
- Many chicks peeping loudly = cold. Lower the heat lamp or plate to accommodate the babies!
WATCH:
- Content Temp = a few over here, a few over there, moving freely between foraging, feeding and drinking
- Too hot = as far as possible from each other and the heat source, maybe panting or holding their wings away from their body
- Too Cold = All together in a pile, as close to the heat source as possible, feathers puffed up
STEP 5: HANDLE YOUR CHICKS
We are not chicken snugglers in this house BUT it is important to handle and snuggle them when they are little to help them later in life. Sometimes a chicken gets hurt, sometimes they get out, sometimes they need a bath! The point is sometimes a chicken needs to get handled and that is 1000% easier to do when they have been handled regularly as babies.
What do I do with a chick?
- Snuggle on your chest
- Perch on your shoulder
- Hold in your hands
- Talk to them
- Feed from your hands
- Play music or a tv show to get used to voices
Won’t it poop on me?
Yes! Use a towel, gloves, and always make sure to wash your hands thoroughly after handling.

THE BEST TIME OF YEAR FOR CHICKS
Society certainly tells us that the best time for chicks is spring but if you have spent any time around us you have heard us wax poetic about the pros of raising fall chicks.
We have always lived in suburban areas with defined zoning laws about the number of birds that we keep and that means taking steps to ensure that we get the most bang for our buck out of our flock.
I watch other homesteaders jokingly chide their flock of 30-75 on social media for being “freeloaders” during the winter after still collecting a basket of eggs for their families. When you are only allowed 2-6 backyard chickens, the winter egg drought looks a lot different. Often not collecting any eggs between the months of October-February. We select early laying breeds to ensure we get the most out of our egg year but also believe that our girls deserve a break. They work hard for us each year!
Time to turn the tables!
DO YOU HAVE WHAT YOU NEED?
Chicks are cute and so easy to bring home – trust me, I know! but making sure you have the equipment you need to keep them healthy and safe is crucial! Its one thing to grab a few last minute items when you pick up your babies at the feed store and another to have 10 week chicks in your bathtub because your coop isn’t complete and its 10 degrees outside (don’t as us how we know!).
We take raising animals very seriously and we have learned a lot of tough lessons along the way. Domesticated livestock don’t really just figure it out. We alone are in charge of their well being and safety. That starts with having what you need when you bring them home.
You can download our printable chick start checklist here.
WHAT OTHER CONSIDERATIONS DO YOU NEED TO MAKE?
Do you travel for work or take frequent vacations? Animals need fed and care even when you go away! Will your regular house sitter engage with chickens? Can you afford extra charges for that?
Does your current pet have a high prey drive? Are you able to train them? Or will you have to hire a professional?
Make sure you consider everything before getting started!
WHY DO YOU WANT BACKYARD CHICKENS?
There are a variety of reasons why you may want to raise chickens! Whether it is more control over your food supply, teaching your children to care for animals, or starting a business there are several factors to consider!
What is most important to you and your family?
- Egg size – most recipes use a standard large egg found in the grocery store but chickens lay eggs ranging from small to jumbo! Know what size egg your chickens lay so it doesn’t affect you can adjust your cooking accordingly
- Egg Color – Egg color has NOTHING to do with the nutrition or quality of the egg! Chickens can lay an egg in a wide range of colors, from the traditional white and brown to blue, green, pink, or green!
- Egg quantity per week – a leghorn chicken can lay 6 eggs per week while a easter egger can average 3. How many eggs do you expect your family to go through in a week?
- Chicken size – larger chickens need more square footage in the coop and in the run
- Temperament – some breeds are NUTS and others are super chill if you are raising chickens to use in lessons with your kids you may want to stock with a Buff Orphington over a leghorn.
- HOA or zoning restrictions – I think we can all agree that it would fundamentally suck if you spent all this money and time researching and installing only to find out you have to get rid of them or enter a lengthy legal battle (HOA rules are no joke!). Know the laws and codes in your area first!
RACOONS, AND HAWKS, AND SKUNKS… OH MY!
Don’t be fooled into thinking that just because you don’t live in the mountains or the woods that you do not have predators in your area. Chickens don’t have a lot of natural defenses they don’t fly or see well night and that leaves them vulnerable to a number of predators. We are responsible for their safety. I recommend you pay attention to the local predators in your area so you can make a plan of action for a secure coop!
Below is a list of predators we saw almost daily in our city rental!
- Ariel Predators
- Hawk
- Falcon
- Bald Eagle
- Climbers and Diggers
- Fox
- Coyote
- Racoon
- Skunk
- Opossum
- Snake
- Bugs
- Mites
- Lice
- Flies
Chickens also have a number of issues that can arise that may lead to a life or death situation. Vets for backyard chickens are few and far between. If you do find one, they will likely be very expensive.
This may be the unpopular opinion in suburban circles but I can assure you in ag circles it is completely normal – make sure you are comfortable culling an animal. Predators and disease happen. Not all problems or diseases are necessarily a death sentence and we have found a lot of very helpful people on facebook groups and other forums who are willing to physically help or talk you through treating your bird. However, sometimes the bird is beyond repair and they will recommend culling.
It is not humane to keep an animal suffering to make yourself feel better.
Have I convinced you yet?
I truly believe that every family could benefit from a small flock of chickens! Start your flock off right with the proper care of your chicks!
No matter what you decide we love to see and hear about your adventures on your property, big or small! Please leave a comment or tag me on Instagram with @TheFryFarmette and #TheFryFarmette so we can cheer you on!
